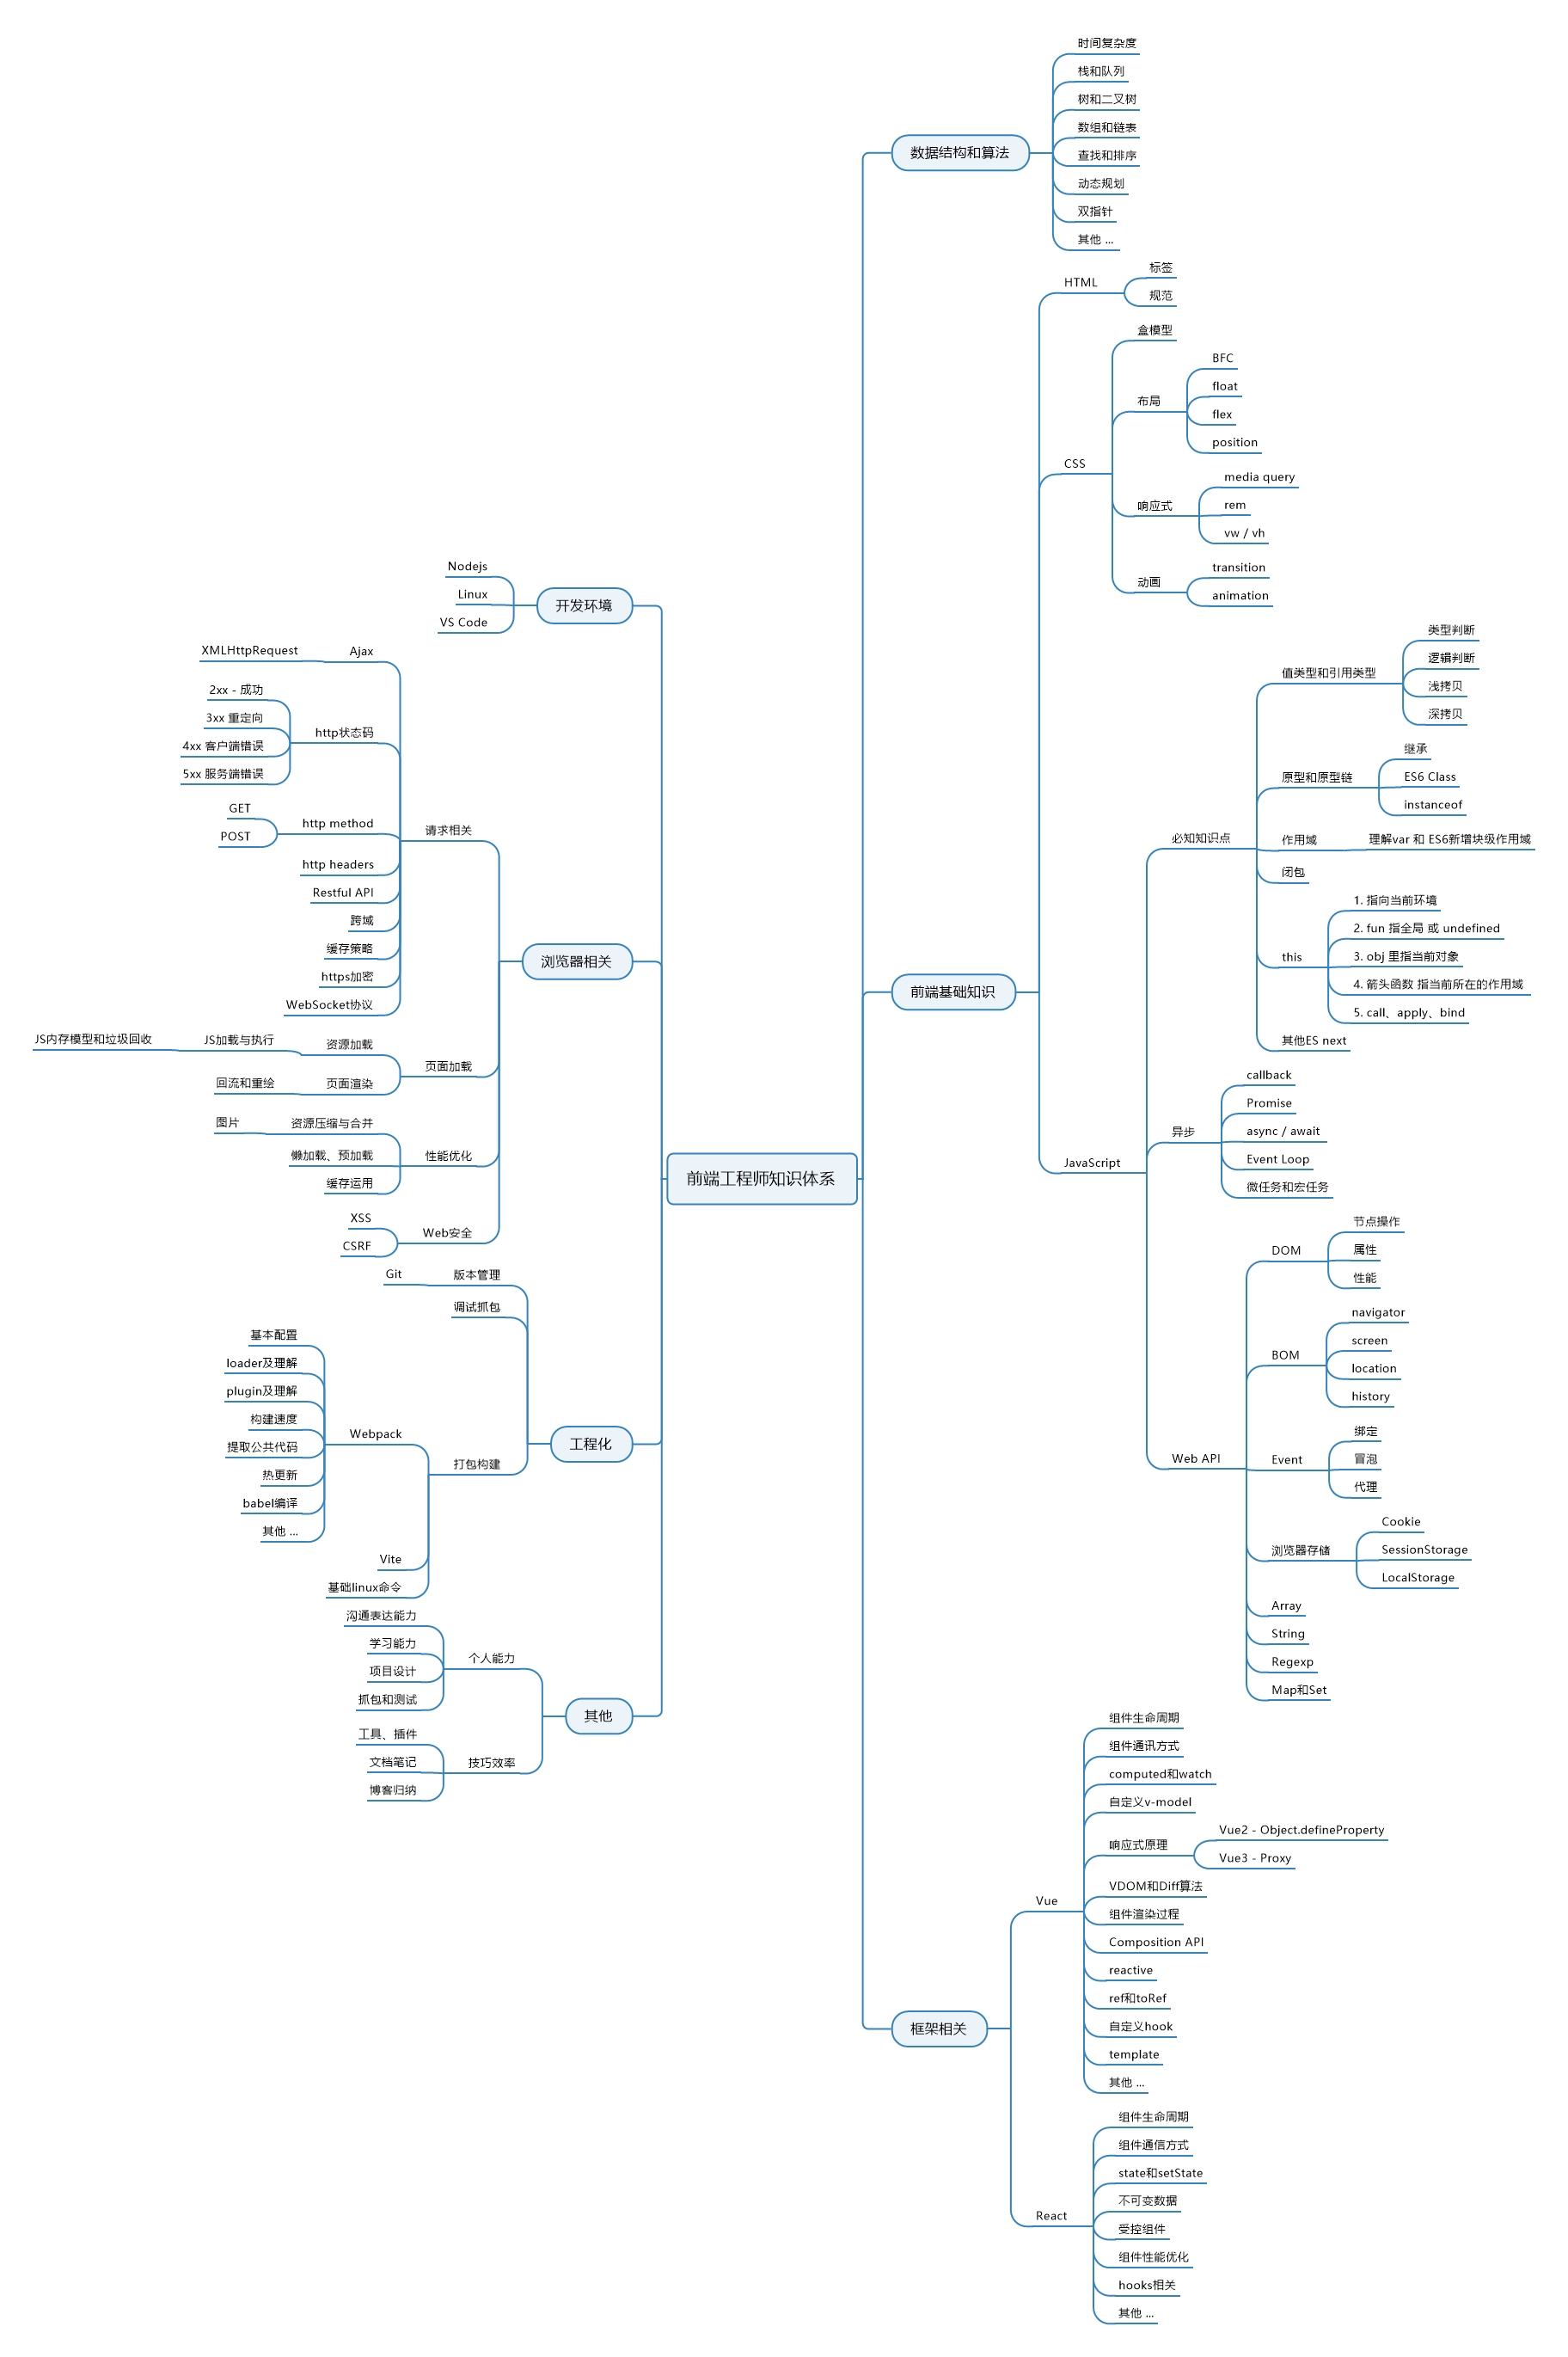
5生命周期
生命周期
每个 Vue 实例在被创建之前都要经过一系列的初始化过程。例如需要设置数据监听、模板编译、挂载实例到 DOM、在数据变化时更新 DOM 等。同时在这个过程中也会运行一些叫做生命周期钩子的函数,给予用户在一些特定的场景下添加他们自己的代码。
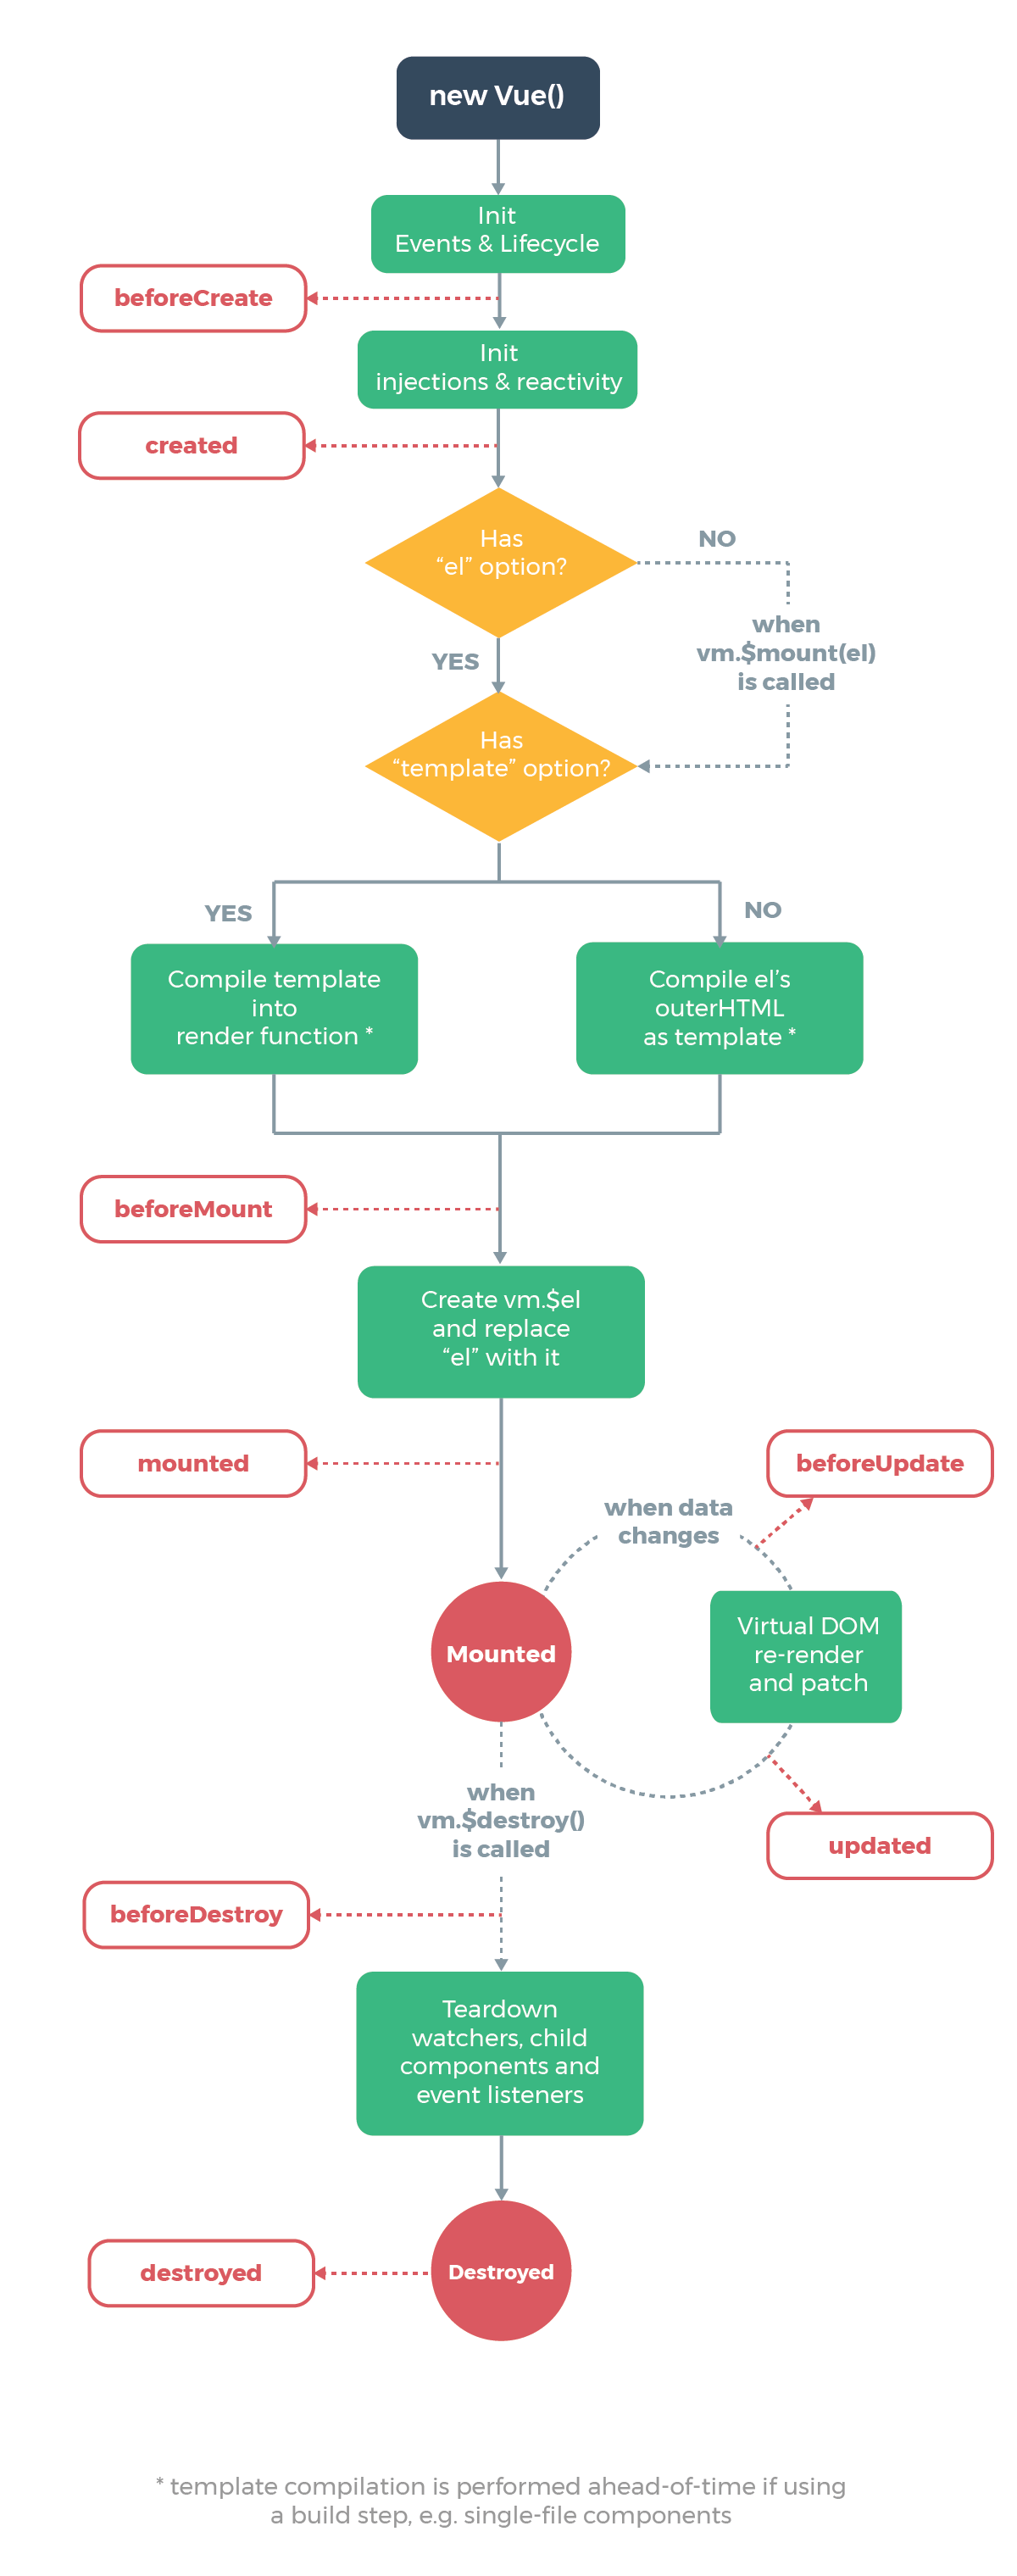
在我们实际项目开发过程中,会非常频繁地和 Vue 组件的生命周期打交道。源码中最终执行生命周期的函数都是调用 callHook 方法,它的定义在 src/core/instance/lifecycle 中:
export function callHook(vm: Component, hook: string) {
  pushTarget();
  const handlers = vm.$options[hook];
  if (handlers) {
    for (let i = 0, j = handles.length; i < j; i++) {
      try {
        handlers[i].call(vm);
      } catch (e) {
        handleError(e, vm, `${hook} hook`);
      }
    }
  }
  if (vm._hasHookEvent) {
    vm.$emit('hook:' + hook);
  }
  popTarget();
}
callHook 函数的逻辑很简单,根据传入字符串的 hook,去拿到 vm.$options[hook] 对应的回调函数数组,然后遍历执行,执行时把 vm 作为函数执行的上下文。
在上一节中,我们详细地介绍了 Vue.js 合并 options 的过程,各个阶段的生命周期的函数也被合并到 vm.$options 里,并且是一个数组。因此 callhook 函数的功能就是调用某个生命周期钩子注册的所有回调函数。
了解了生命周期的执行方式后,接下来我们会具体介绍每一个生命周期函数它的调用时机。
beforeCreate & created
beforeCreate 和 created 函数都是在实例化 Vue 的阶段,在_init 方法中执行的,它的定义在 src/core/instance/init.js 中:
Vue.prototype._init = function(options?: Object) {
  initLifecycle(vm);
  initEvent(vm);
  initRender(vm);
  callHook(vm, 'beforeCreate');
  initInjections(vm);
  initState(vm);
  initProvide(vm); // resolve provide after data/props
  callHook(vm, 'created');
  // ...
};
可以看到 beforeCreate 和 created 的钩子调用是在 initState 的前后,initState 的作用是初始化 props、data、methods、watch、computed 等属性。 那么显然,beforeCreate 的钩子函数中就不能获取到 props、data 中定义的值,也不能调用 methods 中定义的函数。
在这俩个钩子函数执行时,并没有渲染 DOM,所以我们也不能访问 DOM,一般来说,如果组件在加载时需要和后端有交互,放在这俩个钩子函数执行都可以,如果是需要访问 props、data 等数据的话,就需要使用 created 钩子函数。
beforeMount、mounted
顾名思义,beforeMount 钩子函数发生在 mount,也就是 DOM 挂载之前,它的调用时机是在 mountComponent 函数中,它的定义在 src/core/instance/lifecycle.js 中:
export function mountComponent(
  vm: Component,
  el: ?Element,
  hydrating?: boolean,
): Component {
  vm.$el = el
  // ...
  callHook(vm, 'beforeMount')

  let updateComponent
  if (process.env.NODE_ENV !== 'production' && config.performance && mark) {
    updateComponent = () => {
      const name = vm._name
      const id = vm._uid
      const startTag = `vue-perf-start:${id}`
      const endTag = `vue-perf-end:${id}`
      mark(startTag)
      const vnode = vm._render()
      mark(endTag)
      measure(`vue ${name} render`, startTag, endTag)

      mark(startTag)
      vm._update(vnode, hydrating)
      mark(endTag)
      measure(`vue ${name} patch`, startTag, endTag)
    }
  } else {
    updateCompoent = () => {
      vm._update(vm._render(), hydrating)
    }
  }

  new Watcher(vm, updateComponent, noop, {
    before() {
      if (vm._isMounted) {
        callHook(vm, 'beforeUpdate')
      }
    }
  }, true)
  hydrating = true

  if (vm.$vnode == null) {
    vm._isMounted = true
    callHook(vm, 'mounted')
  }
  return vm
}
在执行 vm._render() 函数渲染 VNode 志气啊,执行了 beforeMount 钩子函数,在执行完 vm._update()把 VNode patch 到真实 DOM 后,执行 mounted 钩子。注意,这里对 mounted 钩子函数执行有一个逻辑判断,vm.$vnode 如果为 null,则表明这不是一次组件的初始化过程,而是我们通过外部 new Vue 初始化过程。那么对于组件,它的 mounted 时机在哪呢?
之前我们提到过,组件的 VNode patch 到 DOM 后,会执行 invokeInsertHook 函数,把 insertedVnodeQueue 里保存的钩子函数依次执行一遍,它的定义在 src/core/vdom/patch.js 中:
function invokeInsertHook(vnode, queue, initial) {
  if (isTrue(initial) && isDef(vnode.parent)) {
    vnode.parent.data.pendingInsert = queue;
  } else {
    for (let i = 0; i < queue.length; ++i) {
      queue[i].data.hook.insert(queue[i]);
    }
  }
}
该函数会执行 insert 这个钩子函数,对于组件而言,insert 钩子函数的定义在 src/core/vdom/create-component.js 中的 componentVNodeHooks 中:
const componentVNodeHooks = {
  // ...
  insert(vnode: MountedComponentVNode) {
    const { context, componentInstance } = vnode;
    if (!componentInstance._isMounted) {
      componentInstance._isMounted = true;
      callHook(componentInstance, 'mounted');
    }
    // ...
  },
};
我们可以看到,每个子组件都是在这个钩子函数中执行 mouted 钩子函数,并且我们之前分析过,insertedVnodeQueue 的添加顺序是先子后父,所以对于同步渲染的子组件而言,mounted 钩子函数的执行顺序也是先子后父。
beforeUpdate & updated
顾名思义,beforeUpdate 和 updated 钩子函数执行时机都应该是在数据更新时。 beforeUpdate 的执行时机是在渲染 Watcher 的 before 函数中:
export function mountComponent(
  vm: Component,
  el: ?Element,
  hydrating?: boolean
): Component {
  // ...
  new Watcher(vm, updateComponent, noop, {
    before() {
      if (vm._isMounted) {
        callHook(vm, 'beforeUpdate')
      }
    }
  }, true)
  // ...
}
注意这里有个判断,也就是在组件已经 mounted 之后,才会去调用这个钩子函数。
update 的执行时机是在 flushSchedulerQueue 函数调用时,它的定义在 src/core/observer/scheduler.js 中:
function flushSchedulerQueue() {
  // ...
  // 获取到 updateQueue
  callUpdatedHooks(updatedQueue);
}

function callUpdatedHooks(queue) {
  let i = queue.length;
  while (i--) {
    const watcher = queue[i];
    const vm = watcher.vm;
    if (vm._watcher === watcher && vm._isMounted) {
      callHook(vm, 'updated');
    }
  }
}
flushSchedulerQueue 函数我们之后会详细介绍,可以先大概了解一下,updatedQueue 是 更新了的 wathcer 数组,那么在 callUpdatedHooks 函数中,它对这些数组做遍历,只有满足当前 watcher 为 vm._watcher 以及组件已经 mounted 这两个条件,才会执行 updated 钩子函数。
我们之前提过,在组件 mount 的过程中,会实例化一个渲染的 Watcher 去监听 vm 上的数据变化重新渲染,这段逻辑发生在 mountComponent 函数执行的时候。
那么在实例化 Watcher 的过程中,它的构造函数里会判断 isRenderWatcher,接着把当前 watcher 的实例赋值给 vm._watcher,定义在 src/core/observer/watcher.js 中
export default class Watcher {
  // ...
  constructor(
    vm: Component,
    expOrFn: string | Function,
    cb: Function,
    options?: ?Object,
    isRenderWatcher?: boolean
  ) {
    this.vm = vm
    if (isRenderWatcher) {
      vm._watcher = this
    }
    vm._watchers.push(this)
    // ...
  }
}
同时,还把当前 wathcer 实例 push 到 vm._watchers 中,vm._watcher 是专门用来监听 vm 上数据变化然后重新渲染的,所以它是一个渲染相关的 watcher,因此在 callUpdatedHooks 函数中,只有 vm._watcher 的回调执行完毕后,才会执行 updated 钩子函数。
beforeDestroy & destroyed
beforeDestroy 和 destroyed 钩子函数的执行时机在组件销毁阶段,最终会调用 $destroy 方法,它的定义在 src/core/instance/lifecycle.js 中
Vue.prototype.$destroy = function() {
  const vm: Component = this;
  if (vm._isBeingDestroyed) return;

  callHook(vm, 'beforeDestroy');
  vm._isBeingDestroyed = true;
  // remove self from parent
  const parent = vm.$parent;
  if (parent && !parent._isBeingDestroyed && !vm.$options.abstract) {
    remove(parent.$children, vm);
  }
  // teardown watchers
  if (vm._wathcer) {
    vm._watcher.teardown();
  }
  let i = vm._watchers.length;
  while (i--) {
    vm._watchers[i].teardown();
  }
  if (vm._data.__ob__) {
    vm._data.__ob__.vmCount--;
  }
  vm._isDestroyed = true;
  vm.__patch__(vm._vnode, null);
  callHook(vm, 'destroyed');
  vm.$off();
  if (vm.$el) {
    vm.$el.__vue__ = null;
  }

  if (vm.$vnode) {
    vm.$vnode.parent = null;
  }
};
beforeDestroy 钩子函数的执行时机是在 $destroy 函数执行最开始的地方,接着执行一系列销毁动作,包括从 parent 的 $children 中删掉自身,删除 watcher,当前渲染的 VNode 执行销毁钩子函数等,执行完毕再调用 destroy 钩子函数。
在 $destroy 的执行过程中,它又会执行 vm.patch(vm._vnode, null) 触发它子组件的销毁钩子函数,这样一层层的递归调用,所以 destroy 钩子函数的执行顺序是先子后父,和 mounted 过程一样。
actived & deactived
actived 和 deactived 钩子函数是专门为 keep-alive 组件定制的钩子,后面会专门介绍
总结
这一节主要介绍了 Vue 生命周期中各个钩子函数的执行时机以及顺序,通过分析,我们知道了如在 created 钩子函数中可以访问到数据,在 mounted 钩子函数中可以访问到 DOM,在 destroy 钩子函数中可以做一些定时器销毁工作,了解它们有利于我们在合适的生命周期中做不同的事。